Showing posts with label Organizing. Show all posts

Feb 6, 2011

Tutorial For Storage Box From Soda Case

Have you ever been in need of storage, but didn’t have the extra money at that moment to run out and buy something?  This project will most likely cost you nothing, like it did me!

Supplies needed
Empty case of soda
Wrapping paper or fabric
Invisible tape or glue (if using fabric)
Scissors

1) Cut the top off of your box.
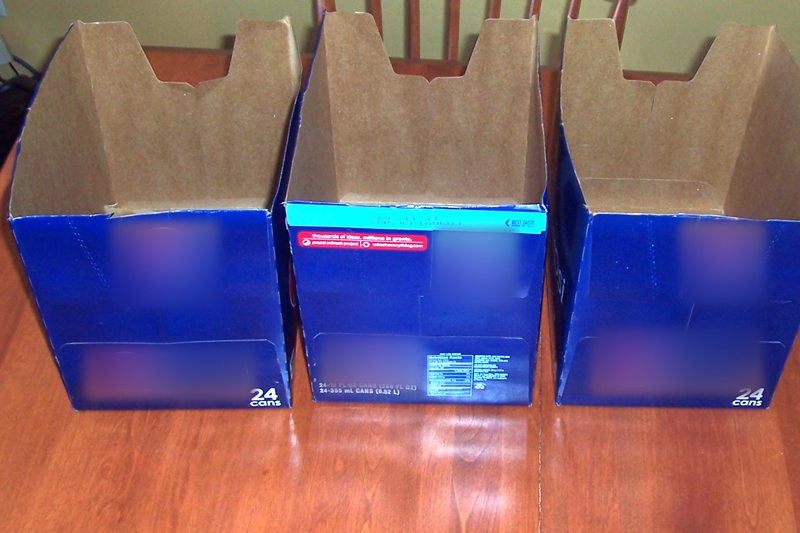
      
 2) Lay your box on top of your paper/fabric to determine where to cut. 


Make sure the length will wrap all the way around the box plus an extra 1”. 
Add enough paper/fabric for 1-2” on the bottom.
Add about 6” to fold over the top.  Less if your box does not have a hole like this.

3) Since I am making more than 1 box, I am cutting my paper in half.  I folded it in half (after making sure I would have enough for each box) then cut along the fold line.


4) When you put your edge at a corner vs the middle your project will appear seamless.  I find it is easier to fold my paper (or iron my fabric) under 1” then line it up to a corner.    
Hold the folded edge to your corner.
Wrap the remaining paper/fabric around your box.
Tape (glue if using fabric) the opposite end to your box.
Tape/glue the neatly folded edge on top at the corner. Tape the entire side of the box.


5) Bottom of box
Cut small triangle out of each corner.  This will make it less bulky underneath.

Fold up your first edge.  
Place one piece of tape in the middle of the paper to hold it to the box.
Go to the opposite side and do the same.
Then do the other two sides.
Once all four sides have been taped down, add a piece of tape at each corner.


 6) Top of box
Do the same as the bottom, except put tape/glue along the whole edge.

There you go, a free box to storage things in that looks nice.  I made four boxes and placed them on the top shelf in my daughter's room for out of season clothes.

Jan 9, 2011

New Year's Resolution To Get Organized

Laura from I'm an Organizing Junkie is an inspiration to me.  If you have never visited her site before then you are missing out.  Go visit her Here.  


She is doing a yearlong challenge to help us get better organized!  Instead of doing a month long challenge, she is breaking it down into 52 week long challenges.  Each Friday she will post a new challenge.  I’m not only looking forward to her posts but also all of the comments from her readers.  


While reading her post from January 6th (here) I followed her link to a previous post she had on brain dumping (here).  Her post on Making Lists and Batching Tasks aka Brain Dumping is a must read!!  I’ve always been one to make list, but lists like this…..

  • Wash laundry
  • Pick up living room
  • Clean kitchen
  • Change linens
  • Vaccum


Laura talks about breaking each task down.  List what needs to be done.  I broke down my “Pick up living room” task.  You can see my PDF for January 9th here.  Why haven’t I thought of this before!!  Seeing all of the little things written down in my notebook makes it feel like it is easier to do.  I can take an easier task and assign it to one of the kids.  My kids don’t do much of anything around the house.  One is 3 and the other will be 7 in May.  I want to start them off slowly so there isn’t too much a fight J  I want to raise them to be good adults not someone that expects someone to do everything for them.  

Jan 4, 2011

Toy Storage Solutions!

www.infarrantlycreative.net has a tutorial for organizing toys!  She has even made a few games to play with the cards.
musicalinstruments


IMG_1933


IMG_1952

Nov 28, 2010

Storage Ideas

Here are some great ideas for storing anything that needs a home.


Make this bin holder and add it to your desk for a little extra storage.


Mod Podge a set of drawers.  A great way to add color to your room.


This tutorial uses recycled three match boxes to create this handy storage chest.
Related Posts Plugin for WordPress, Blogger...