Jan 5, 2011
Mending Clothes
If your family is anything like mine, the next few tutorials will be used often. They are about mending clothes. My DH always seems to rip his jeans at the back pockets. I have been mending them to his satisfaction, but not to mine. This tutorial is so easy to follow and the end result it perfect! You can find the tutorials here for the back pockets and here for patching knees.
Table Runner
Diary of a quilter has some great tutorials on quilting. Choosing fabric, how to work with quilting patterns, rotary cutting, borders, batting and different binding methods are just a few of the tutorial you will find HERE at Diary of a quilter.
HERE you will find the tutorial for this super easy table runner.
Jan 4, 2011
Toy Storage Solutions!
www.infarrantlycreative.net has a tutorial for organizing toys! She has even made a few games to play with the cards.
Dec 22, 2010
Fabric Necklace
How-To Tuesdays: Fabric Scrap Necklace
A casual accessory to wear with a simple t-shirt. This is a great way to add a bit of color to your outfit as apposed to wearing a beaded necklace. I'm not big on beaded necklaces. Click on picture to go to the tutorial to make one of your own.
Gift Ideas
Family Frame
Perfect For: A far-away relative, your best friend, Grandma and Grandpa
Make It Say Christmas: Use holiday-theme papers and favorite photos from past Christmases.
The Write Stuff
Create custom stationery for a friend by embellishing an unfinished wooden box and plain-Jane note cards with ribbon and buttons. Attach the ribbon and buttons with double-sided tape or hot glue. Line the inside of the box with brightly colored paper.
Monogrammed Note Cards
Perfect for a teacher, decorate a purchased tin with chipboard letters and pack it with monogrammed note cards.
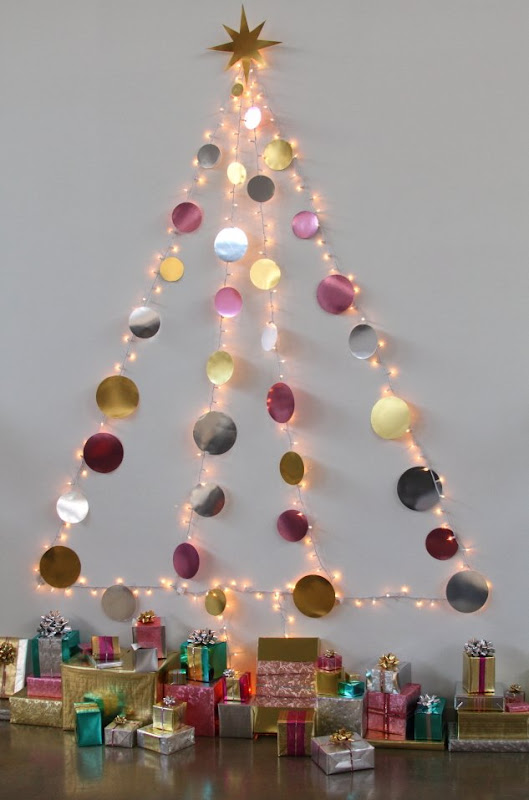
This is such a creative way to add a touch of Christmas to any room!
30 Frugal Gift Ideas to Show You Appreciate Someone
Teacher's Love Gifts Too
Mya headed off to school this morning proudly carrying this gift all wrapped up with a pretty red ribbon. I started this project in Photoshop. Once I created all of the pieces I disected it to print. I printed the base papers as one image. The rest of the pieces where cut printed then cut out then assembled back on top of the base. Below is the layout I create for printing out this hybrid project. A hybrid project is something that is created digitally, but then printed, cut and glue in a traditional scrapbook/card making way. If you have the ability, always save it as a PDF so the images won't accidentally get reduce because of margin issues! Note to self - stop making tiny things to cut out :-) The toughest item to cut out was the "read and learn" image. The hardest thing to glue and place were the letters, since I couldn't find my bead tweezers. I used them to make daughter's flowers at Halloween. Now if I could only figure out where I put them.
Gift Wrapping
Used Pentel Hi-Polymer Erasers and a craft knife to make your own stamps. Tutorial can be found here.
GIFT WRAPPING MARTHA STYLE
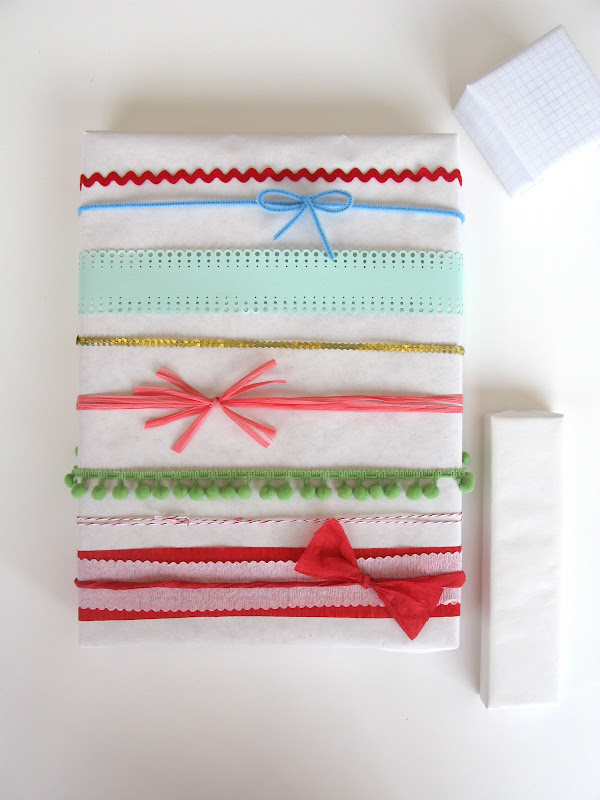
I always use ribbon, trim or even yarn to finish off my presents. The wrapping should be a special as the present inside is! People spend so much time finding that perfect gift for someone. Why not take a few extra minutes and an extra dollar to make it look unforgettable! Go to your local fabric store and browse the trim shelves. For about $.30 - $1 per yard you can buy some awesome items to wrap around your gifts. The possibilities are endless. Here are a few ideas from Martha's website. Here is the photo gallery.


GIFT WRAPPING MARTHA STYLE
I always use ribbon, trim or even yarn to finish off my presents. The wrapping should be a special as the present inside is! People spend so much time finding that perfect gift for someone. Why not take a few extra minutes and an extra dollar to make it look unforgettable! Go to your local fabric store and browse the trim shelves. For about $.30 - $1 per yard you can buy some awesome items to wrap around your gifts. The possibilities are endless. Here are a few ideas from Martha's website. Here is the photo gallery.
Martha Stewart's Craft Sale 2010
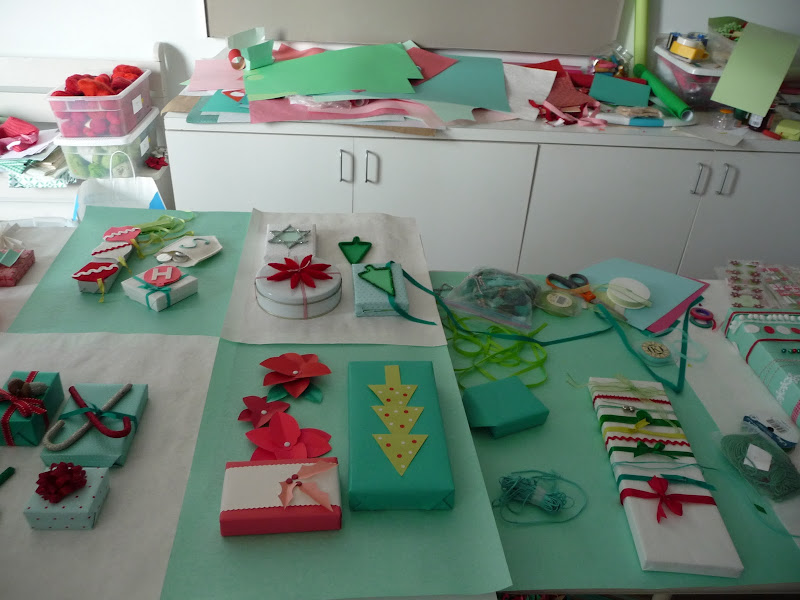
It would be wonderful to attend her Holiday Craft Sale one of these years! Here are a few of the things I would have bought; or made as soon as I came home :-)
They made these from one of Martha's punches like this one. [link] What a great idea for on your tree or as a wonderful gift wrapping accessory!
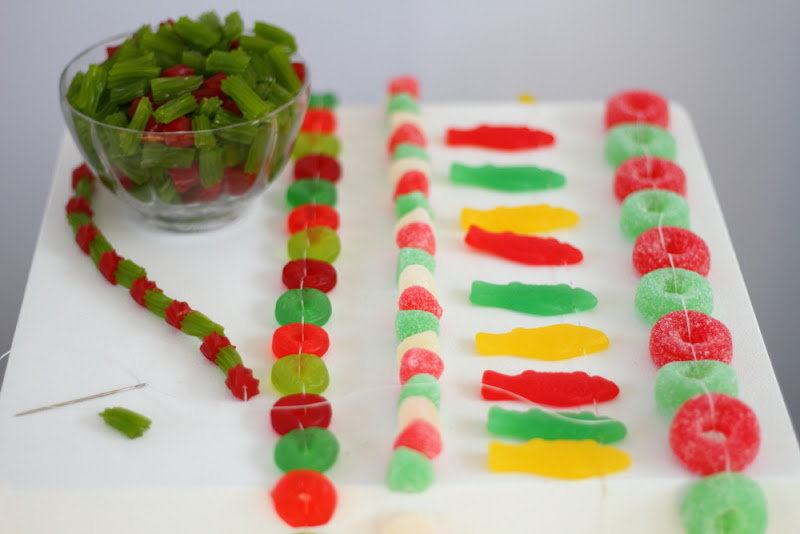
I love this idea! The kids and I strung Fruit Loops cereal one year, but I prefer this better! By stringing them this way you get to see the whole candy, not just the side of it.
This would be fun to do in a kids bedroom or on a front porch.
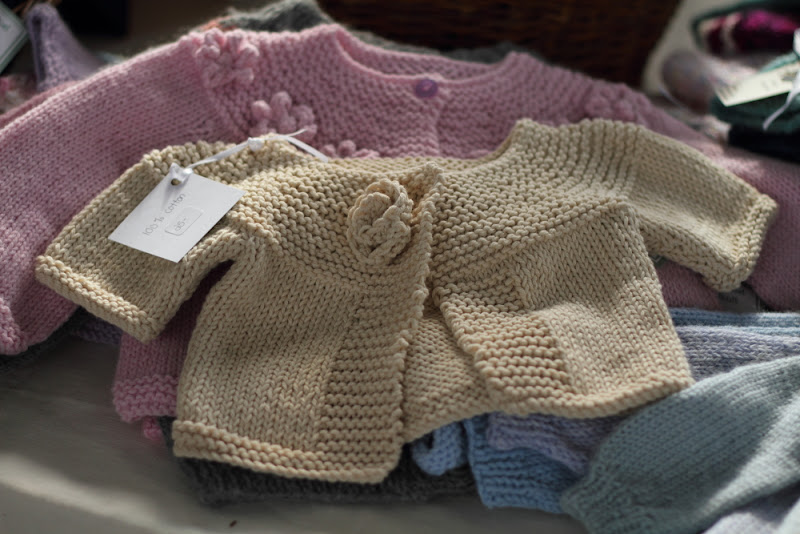
I would have bought one of these beautiful sweaters!! I wonder if they come in adult sizes ;-)
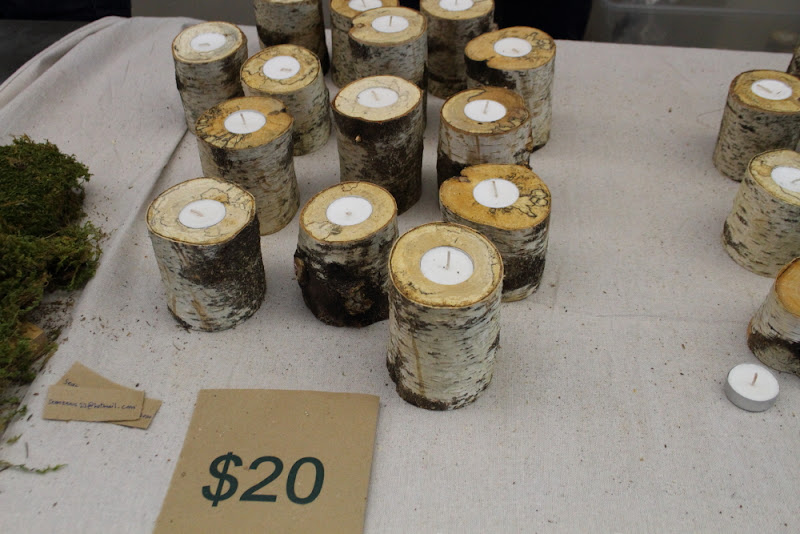
A few of these lined up on my dinning room table would like wonderful.
Here is the link for Martha's Photo Gallery from this years Craft Sale. [link]
Dec 19, 2010
Yummy Popcorn!
A few yummy popcorn recipes to try!
Note ~ 1 cup of unpopped popcorn kernels will yield about 2 quarts of popcorn.
Perfect Popcorn Recipe
INGREDIENTS:
- 3 Tbsp canola, peanut or grapeseed oil (high smoke point oil)
- 1/3 cup of high quality popcorn kernels
- 1 3-quart covered saucepan
- 2 Tbsp or more (to taste) of butter
- Salt to taste
METHOD
1 Heat the oil in a 3-quart saucepan on medium high heat.
2 Put 3 or 4 popcorn kernels into the oil and cover the pan.
3 When the kernels pop, add the rest of the 1/3 cup of popcorn kernels in an even layer. Cover, remove from heat and count 30 seconds. (Count out loud; it's fun to do with kids.) This method first heats the oil to the right temperature, then waiting 30 seconds brings all of the other kernels to a near-popping temperature so that when they are put back on the heat, they all pop at about the same time.
4 Return the pan to the heat. The popcorn should begin popping soon, and all at once. Once the popping starts in earnest, gently shake the pan by moving it back and forth over the burner. Try to keep the lid slightly ajar to let the steam from the popcorn release (the popcorn will be drier and crisper). Once the popping slows to several seconds between pops, remove the pan from the heat, remove the lid, and dump the popcorn immediately into a wide bowl.
With this technique, nearly all of the kernels pop (I counted 4 unpopped kernels in my last batch), and nothing burns.
5 If you are adding butter, you can easily melt it by placing the butter in the now empty, but hot pan.
6 Salt to taste.
Makes 2 quarts, a nice amount for two people, or for one hungry one.
Additional tips: From the comments section
a If you add salt to the oil in the pan before popping, when the popcorn pops, the salt will be well distributed throughout the popcorn.
b Fun toppings for the popcorn - Spanish smoked paprika, nutritional yeast, cayenne powder, chili pepper, curry powder, cumin, grated Parmesan cheese.
Carmel Corn
Caramel corn is quite easy to make, just don't attempt to make it (or any candy) on a humid day. Be careful as the caramel sauce is quite hot; as a safety precaution do not have children running underfoot while making this recipe.
INGREDIENTS
- 4-5 quarts popped popcorn (a double batch of this popcorn recipe, unsalted, unbuttered)
- 2 cups firmly packed brown sugar
- 1 cup (2 sticks) unsalted butter
- 1/2 cup dark corn syrup
- 1 Tbsp molasses
- 1 teaspoon salt
- 1/2 teaspoon baking soda
- 2 cups salted peanuts (optional)
METHOD
1 Heat oven to 225°F. Place popcorn in large roasting pan; set aside.
2 Combine brown sugar, butter, corn syrup, molasses and salt in a thick-bottomed, 2-quart saucepan. Cook over medium heat, stirring occasionally, until mixture comes to a full boil. Continue cooking, stirring occasionally, until candy thermometer reaches 250°F or small amount of mixture dropped in ice water forms a hard ball (about 12 to 14 minutes). Remove from heat; stir in baking soda. The caramel will foam up a little and turn a lighter color when you add the baking soda.
3 Carefully pour hot mixture over the popcorn in a large roasting pan. (If you would like peanuts with your popcorn, sprinkle the salted peanuts over the caramel sauce at this point.) Using a wooden spoon, stir until all popcorn is coated. (Be careful not to let the caramel touch you; it's very hot.) Place in oven for 20 minutes. Remove from oven, stir to more evenly coat the popcorn with the caramel sauce. Return to oven. Continue cooking for 20 minutes. Remove from oven. Immediately spread caramel corn out onto waxed paper. Let cool completely. Break into bite-sized pieces. Store in tightly covered container.
Makes about 5 quarts.
Roger's Carmel Corn
1 1/2 c. brown sugar
2 T. butter
1/3 c. water
2-3 bags of microwave popcorn, popped (I use lite butter)
2 T. butter
1/3 c. water
2-3 bags of microwave popcorn, popped (I use lite butter)
Directions:
Mix and boil the first three ingredients on medium, stirring continually, until reaching the "softball" stage. Once the carmel is ready, pour over the popped corn and distribute the sugary goodness evenly by stirring with a wooden spoon. If you can't possibly wait a minute longer, dig in immediately! However, I find the popcorn tastes a bit better once the carmel has cooled and set (about 30 minutes).
Popcorn Balls
12c air popped popcorn
1/4 c butter
1/2 c sugar (or brown sugar)
1/2 c corn syrup
1 tsp vanilla
pinch salt
1/4 c butter
1/2 c sugar (or brown sugar)
1/2 c corn syrup
1 tsp vanilla
pinch salt
Microwave the butter, sugar and corn syrup 3-4 min. on high. Stir in vanilla and salt, then pour over popcorn and form into balls.
Subscribe to:
Posts (Atom)